Tech News Back Issues Issue: 103002
|
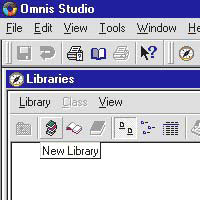
Introduction to the Omnis Web Client: Part 3, Getting started with a web client application By Dr Caroline Wilkins In the previous newsletter, we looked at some of the web client components available to the developer. In the next few issues of the newsletter, we are going to put some of them together to build a basic application that will enable a user to enter data, upload a picture to the Omnis server to go with the record and then view the data and associated picture. The application we will build is similar to one that is used by animal rescue shelters in the RescuePet system (www.rescuepet.org.uk) to upload details and photos of animals for re-display on a public web site. This example library can easily be adapted for any number of applications. In this newletter, we create a library, a database, connect library to database using Startup_Task, create a schema and drag it into the database to create a corresponding table. All this is basic Studio programming and does not involve web client specific work. That will follow in the next newsletter. 1. Create a library 1.1 Create a new library for your project in C:\RescuePet\
directory. To do this, select the 'Library' >> 'New' menu option from
the Library browser menubar.
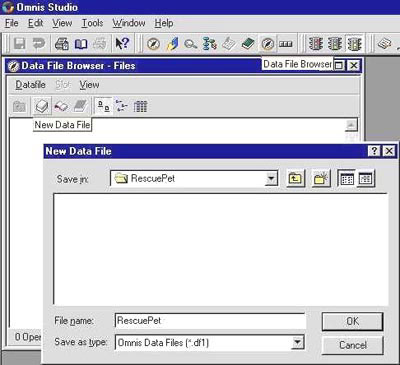
2. Create a database 2.1 Open the Data file Browser from the View menu and
select 'New' from the Datafile menu. Choose a name for your database.
For this example, use RescuePet.df1. Put it in the same directory as your
library: C:\RescuePet.
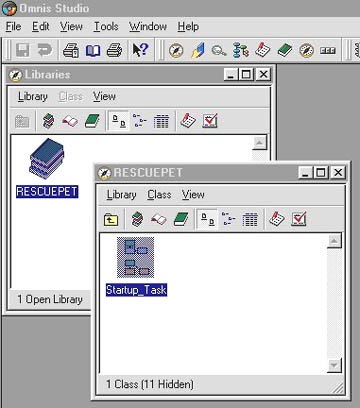
3. The Startup_Task 3.1 In the Libraries browser, double click on the RESCUEPET
library to view the contents of the library. There should just be a Startup_Task.
The code inside this class executes when the library is opened. We will
use it to create a session to the database.
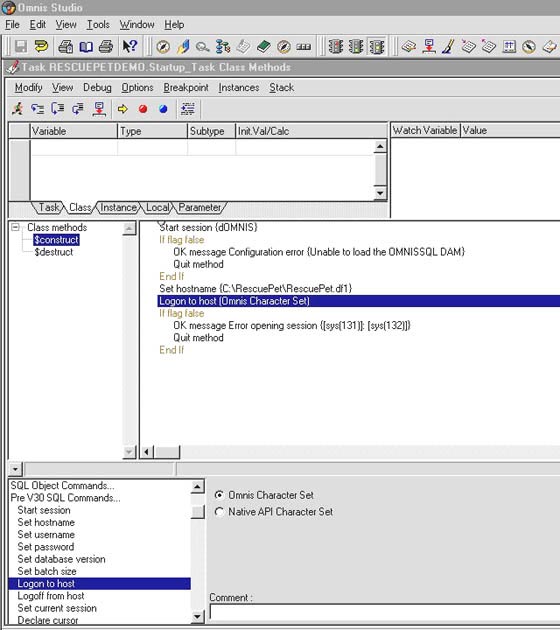
4. Connecting to the database 4.1 Enter the code given below. This will open a session to the database (RescuePet.df1) that you just created. Note that you must give the full path to the database file in line Start_Up.$construct
4.3 Close the method editor window when you are done. 5. Creating a Schema 5.1 Now it's time to start creating the structure of
the database. We use a Schema class to hold the columns of the database
table. This is Omnis's view of the database, but can also be used to create
database tables, as you will see.
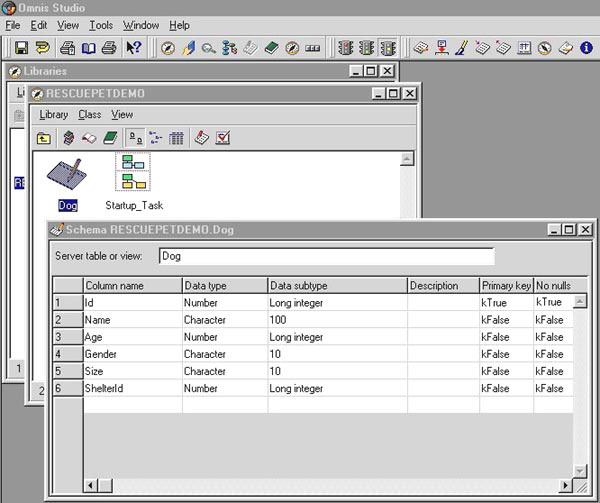
6. Designing the Schema 6.1 Double click on the Dog Schema class and enter some
fields to hold data about dogs. For this exercise, try:
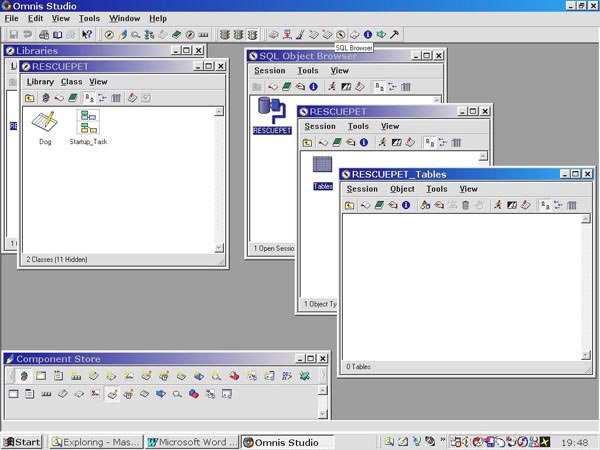
7. Creating a table from a schema 7.1 Double click on the RESCUEPET session to open the
RESCUEPET session window.
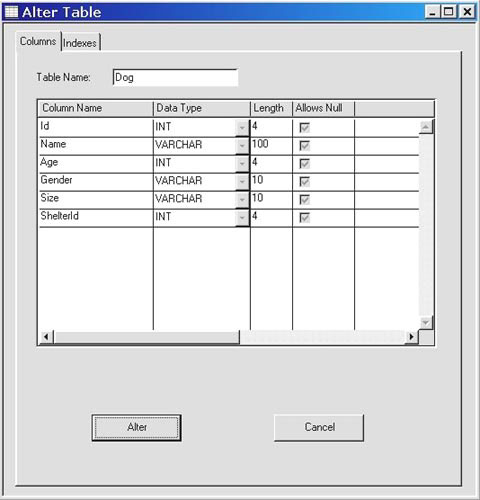
7.3 To create a Dog table, click on the Dog schema in
the Library browser and drag into the RESCUEPET_Tables window.
We have now created an Omnis library, an Omnis database, we have programmed a startup task that will open a session to that database and have created a Dog schema in the library to represent a Dog table in the database. We are now ready to build a user interface. In the next newsletter, we will use the library and database we have built here and go on to create a web client interface to the database. |
|
| © 2002-2003 Copyright
of the text and images herein remains with the respective author. No part
of this newsletter may be reproduced, transmitted, stored in a retrieval
system or translated into any language in any form by any means without
the written permission of the author or Omnis Software. Omnis® and Omnis Studio® are registered trademarks, and Omnis 7™ is a trademark of Omnis Software Ltd. Other products mentioned are trademarks or registered trademarks of their corporations. All rights reserved. |


 Please logon or create a free account to download this file.
