Tech News Back Issues Issue: 101602
|
Introduction to the Omnis Web Client: Part 2, Web Client Components By Dr Caroline Wilkins We have discussed issues pertaining to the client and
server deployment of web client. Now we look at some of the components
available to the developer to construct a web client application.
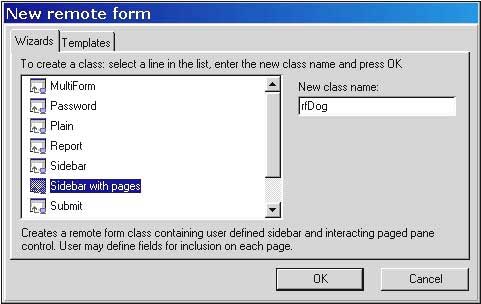
Alternatively, use the remote form wizard to create
a plain remote form and accompanying remote task. In the Library Browser
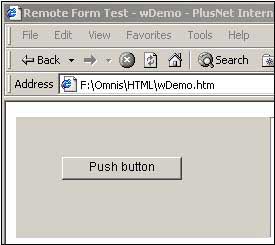
window, select: Class> Wizards >Remote Form and follow the wizard. Pushbutton Responds to an evClick event. Is used to trigger a method in response to user interaction. The Pushbutton component is contained within the Formflds.dll which is part of the core installation of web client:
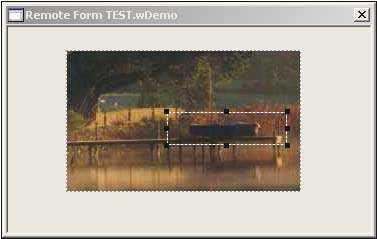
Button Area Responds to an evClick event. Is used to trigger a method in response to user interaction. The Button Area is invisible and is placed over a graphic to create a button interface effect. The Button Area component is contained within the Formflds.dll which is a core dll which is part of the core installation of web client:
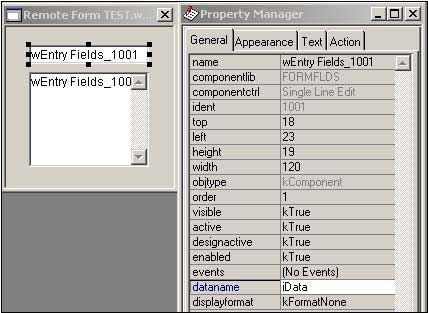
Single Line and Multi Line edit boxes Used to display text data and enables user to enter data when $enabled property is set to kTrue. The data that is displayed or entered is held in the variable corresponding to $dataname. The evAfter event enables the programmer to specify what will happen after the user tabs out of this field. The Single and Multi Line edit box components are contained within the Formflds.dll which is part of the core installation of web client:
Radio Group Used to display mutually exclusive choices:
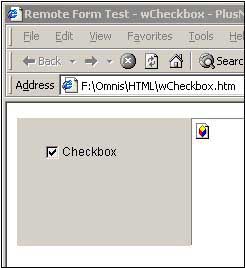
Checkbox Used for boolean data (on/off, yes/no):
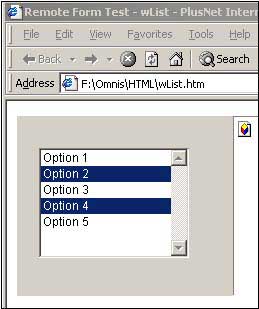
List Used for display of single column list data:
Drop List Used for a select list:
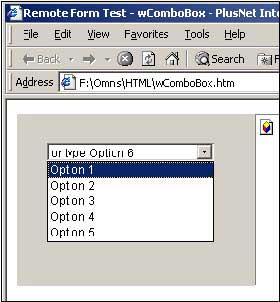
Combo Box Used for a list or user entry:
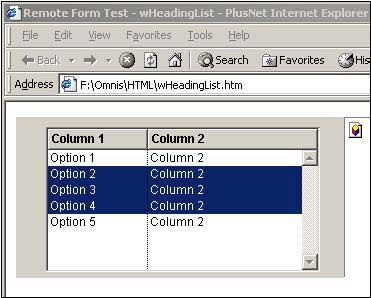
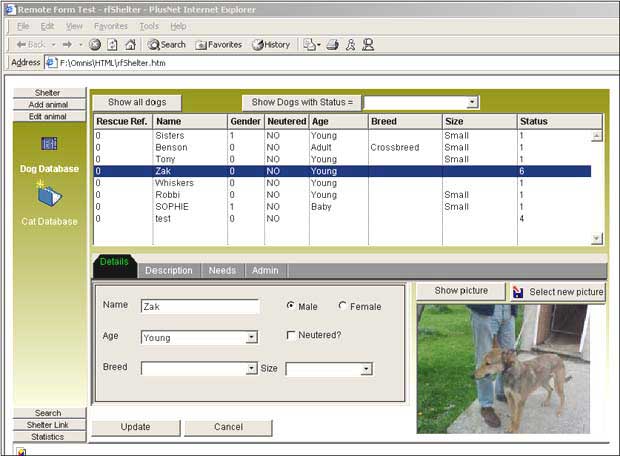
Heading List Used for multi-column list with column headings:
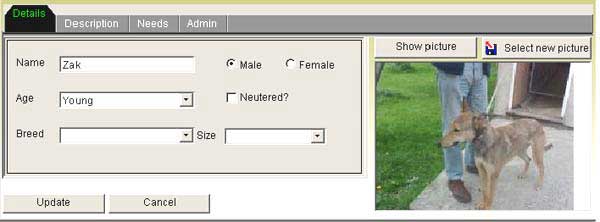
Paged Pane Used to create multiple screens on a single remote
form:
Tab bar Used to control a page pane:
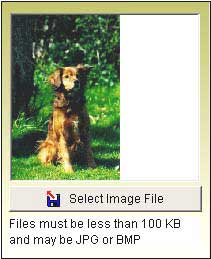
Formfile Used to read/write files on client:
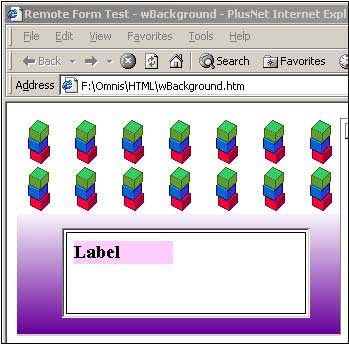
Background Components Use to identify objects and create various graphic effects:
We have discussed the basic components of web client here. In a future newsletter, we will put them together to make an application.
Event Handling: Exploring EventsBy David Swain In the last issue of Omnis Tech News I promised to illustrate the concepts described in that article with a number of examples in this one. But rather than just showing you a few common events and how to deal with them, let me show you how to explore complex event cycles yourself with a simple technique I developed years ago. This technique (as with any other programming) relies upon chaining together a few things we already know in a precise way to achieve a desired result. In our case here, we want to see how chains of events unfold for various actions a user might commonly perform. What We Know There are seven facts we already know about Omnis Studio that we will use in this technique:
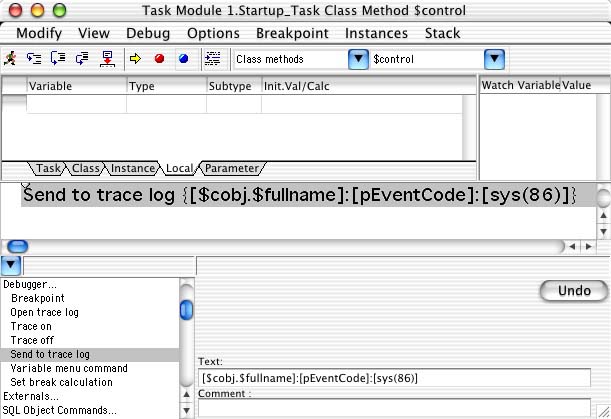
These facts are the basis of this technique. Now let’s see what we can do with them. What We Can Do With What We Know In anthropology and other scientific disciplines we learn early on that observed events can be affected by the observer in such a way that the event itself is changed from its unobserved potential. In our experiment, we would like to observe our Omnis events without affecting them any more than necessary. Time-tested techniques like tossing in an occasional OK message dialog or dropping into the debugger are poor choices because they disrupt the very event cycle we wish to observe. So what other alternative is there? I have found that the “purest” way to simply observe the event cycle is to do nothing other than pass the event description from a $control method at the task level to the Trace Log. By “do nothing” I mean that we comment out or remove all code from other $event and $control methods (or remove those methods themselves!) and just focus on the events that are reported to us. If we have a large enough monitor, we can even leave the Trace Log window open and observe the reported events as they happen. There is still a slight perturbation of the flow of events if we happen to bring the Trace Log window to the front (perhaps to clear it) and then bring our test window back to the front, but these too are events that we need to understand (already open window brought to the front with a window click). The $control method in our task class contains one line for now: Send to trace log {[$cobj.$fullname]:[pEventCode]:[sys(86)]}
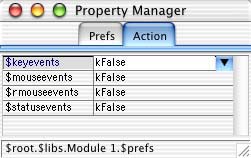
Actually, we can get rid of the “[pEventCode]” portion as sys(86) includes this information, but leave it for now if only to prove that this is true. There is still a bit of work to do before we test this (besides removing all our $event and $control code from levels below “task”, that is). The Simplest Setup Let’s set up Omnis Studio to give us the simplest event cycles to begin with. A few options in Omnis Studio can complicate the event cycle and we want to explore the simplest cases first. We can build in much more complexity later. To get the simplest setup, we have to turn off or otherwise modify various settings. Special Events The first thing we must do is turn off the “special” event detection of mouse, right-mouse, status and key events. As we will see later, these add cycles to event processing that can cloud our early exploration. These are found in the “Action” tab of the “Preferences” for our library. We can access them by context-clicking on the library’s icon in the Library Browser, by selecting the library in the Browser and either selecting “Properties...” from the Browser’s View menu or clicking the “Properties” button in the Browser’s toolbar, or by drilling down to the “$prefs” item for our library using the Notation Inspector. (Enough choices for you?) We need all four of these set to “kFalse” for now.
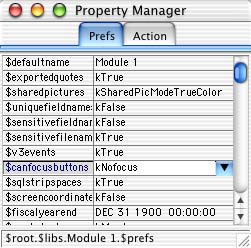
Button Focus Options While we have the Property Manager pointing to library preferences, we should also set the “canfocusbuttons” property found under the “Prefs” tab to “kNoFocus”. If pushbuttons are allowed to receive the focus, this adds another event cycle when a pushbutton is clicked. Certainly there is nothing wrong with buttons receiving the focus in a finished application, but we’re going for simplicity here.
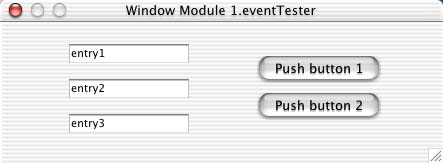
Creating A Test Window Now all we need is a simple window with a few well-chosen field objects in it to test our event tracking technique. In the figure below, I have created a new window class with three entry fields and two pushbuttons.
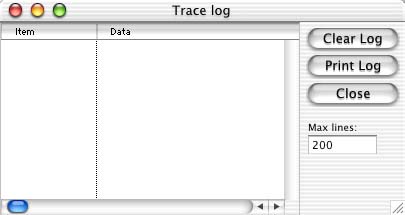
The entry fields are named “entry1”, “entry2” and “entry3” and the pushbuttons are named “pushbutton1” and “pushbutton2”. We don’t need to give these fields any special properties, but make sure the window’s “modelessdata” property is set to “kTrue”. Now double-click on one of these field items to open the Method Editor and remove all lines of code from the $event method of each object (or remove the $event methods completely). Once this is done, open the Trace Log using the Options menu of the Method Editor and drag it to a convenient, out-of-the-way location and we can begin our exploration. Assuming that the proper code is in your task $control method, any events that occur should now appear in the Trace Log window.
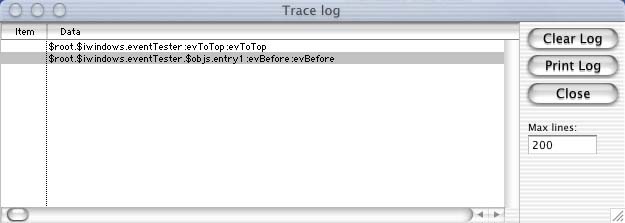
Since we are sending text to the Trace Log and not actually tracing command lines as they execute, the first column in the Trace Log window will remain empty. We can drag that column to a smaller width and/or increase the width of the window to see more of our event description text. Event Cycle Examples The first thing we must do is open a test instance of our window class using Control/Command-T for the window class context menu. We notice that two lines appear in the Trace Log when this happens, indicating that two event cycles have occurred:
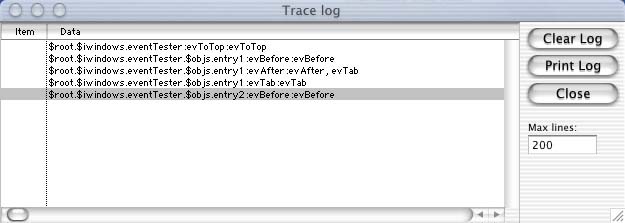
The first cycle dealt with the fact that when a window opens, it comes “to the top” for the first time. This is immediately followed by the focus entering the first entry field (since the window is in “modeless data entry” mode). If we now press the Tab button (to move the focus to the next data entry field), we see three more event description lines appear in the Trace Log window:
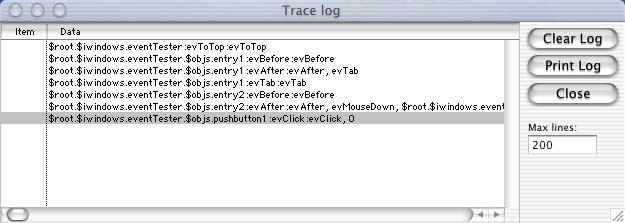
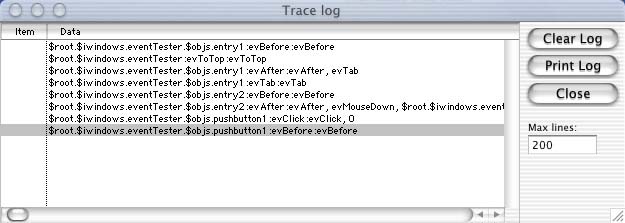
First, the focus intends to leave the current field (entry1) with the value of pNextCode indicating the reason this is happening (that an evTab event is about to take place). Then the evTab occurs in a separate cycle. The result of this tab event is that the focus must now enter the second entry field, so an evBefore event then occurs to entry2. So three event cycles we needed to cause this single action from the user - giving us three separate opportunities to detect and react to portions of this operation. We can issue an “On evAfter” for entry1, a conditional “If pNextCode=evTab” within that block to separate the “tab” cause of “after” from other possibilities, an “On evTab” for entry1 and/or an “On evBefore” for entry2 (to set an initial value, perhaps). Plenty of opportunity to intervene in these cycles! Now click on the first pushbutton. Since mouse events have been disabled and pushbuttons are not allowed to receive the focus in our current setup, only two event cycles accompany this user action:
Notice that an “evAfter” event happens to the current entry field even though the focus doesn’t leave the field. Also notice that pNextCode equals “evMouseDown” even though mouse events have been disabled. It is still the initial mouse down that causes the “after” event. Furthermore, the event parameter “pClickedField” contains a notational reference to the object receiving the “mouse down” event. Since mouse events are currently off, the pushbutton field receives a full “evClick” event. The “0” that accompanies this is the “row number” that was clicked upon. This only actually applies to list fields and is given a “0” value for all other field types - but it still is part of the “evClick” event description. So what would have happened if we hadn’t disabled the “canfocusbuttons” property? Adding Button Focus Let’s set that property to “kFocus” and see! Now when we click the pushbutton, we get three event cycles:
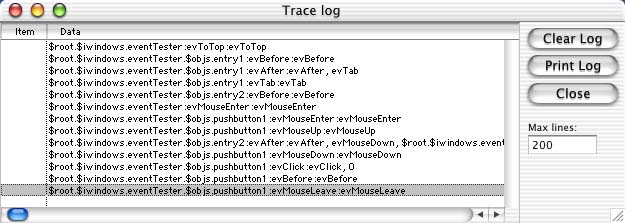
The two cycles that happened before happen in the same manner, but they are now followed by an “evBefore” cycle with the pushbutton field receiving the focus. Adding “Special” Events If we now enable mouse events by setting the “mouseevents” property to “kTrue” and perform these actions again, we get a whole new set of event cycles:
Let me try to sort this out for you... When mouse events are turned on, we not only see “mouse down” and “mouse up” events occurring, but “mouse enter” and “mouse leave” events as well - on everything! Notice that in order to click on the pushbutton, the mouse had to first enter the window, then enter the pushbutton field. (And I was being careful not to pass over anything else!) This was not part of the “click” event cluster, but had to happen so we could even be in position to click the pushbutton. The cluster of event cycles accompanying the click on the pushbutton began with a “mouse up” event. While this may seem counter-intuitive, think about it for a moment. My interpretation of the facts before us is that the click is not a click until the mouse goes up over the same object it went down on (the precise technical term here...). So the “mouse up” on pushbutton1 leads to an “after” event on entry2 (the current field at the time) which is accompanied by a value of “evMouseDown” in pNextCode. The “mouse down” event on pushbutton1 follows, and is followed in turn by first the “evClick” and then the “evBefore” event before finally allowing control to return to the user.There are five event cycles that described this user action. The “mouse leave” event was not technically part of the “click” cycle cluster. I had to move the mouse to go off and take a snapshot of the Trace Log. But the user in a real world application would also eventually have to get off the button - and would, in fact, generate a series of “mouse enter” and “mouse leave” events in the wake of any moouse movements as long as the “mouseevents” property is enabled. Testing Other Field Object Types Hopefully, this brief exercise has whet your appetite for event exploration and given you the tools necessary to observe clusters of event cycles without unduly affecting them. There are many interesting surprises awaiting you - and a few mental exercises like the one above to help you be clear about the chain of events that some user actions trigger. Go ahead and add other field types to the test window (like list display fields, for example) and see what the Trace Log tells you about how the event handler sees user actions involving them. In the next few articles, we’ll take a closer look at the “special” event types (mouse, right mouse, keystroke and status events) and explore their uses. |
|
| © 2002-2003 Copyright
of the text and images herein remains with the respective author. No part
of this newsletter may be reproduced, transmitted, stored in a retrieval
system or translated into any language in any form by any means without
the written permission of the author or Omnis Software. Omnis® and Omnis Studio® are registered trademarks, and Omnis 7™ is a trademark of Omnis Software Ltd. Other products mentioned are trademarks or registered trademarks of their corporations. All rights reserved. |


 Please logon or create a free account to download this file.
