The Omnis ODBC Driver is available on Windows and macOS platforms and enables read-only access to Omnis data files. You can use it to import data into ODBC-compliant applications such as Microsoft Access, Excel and Word using the Microsoft Query tool.
There are also separate versions of the ODBC Driver available for Unicode and non-Unicode/legacy data files (Omnis 7 & pre-Studio 4.3.2).
Before you can access an Omnis data file via ODBC, you need to add one or more ODBC users to the data file. These user names and passwords are used to authenticate users attempting to connect to the data file. Each user also has an associated ODBC access mask value which is used to enable or disable access to one or more of the tables inside the data file. Therefore, each user can have customized access to certain tables whilst being denied access to others.
You can find the ODBC Admin tool in Omnis Studio by selecting the
Tools -> Add-Ons->ODBCAdmin… menu option.
Press Open Data File to proceed, then select the Tables tab.
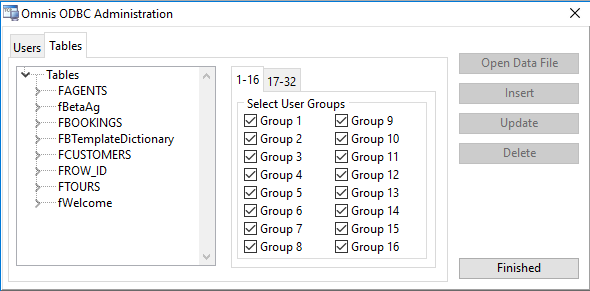
This is where you select which tables will be visible via ODBC. Each table has an associated 32-bit access mask; shown as two banks of 16 checkboxes.
The choice and assignment of groups is entirely user-defined, but a table must be a member of one or more groups to permit access.
Select (single-click) each table in turn and select one or more of the checkboxes, e.g.
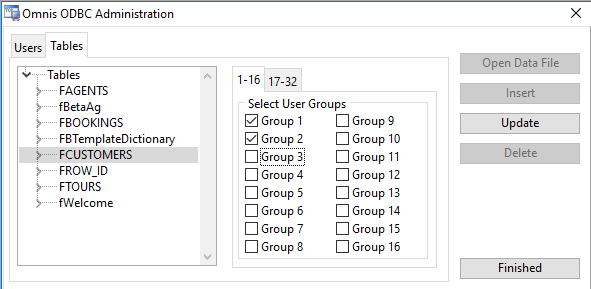
When you enable a table for ODBC access, all of its columns are enabled by default. You can further restrict access to a table’s individual columns by expanding the tree list on the left, or by double-clicking the table name. Select and uncheck the group box(es) to hide individual columns.
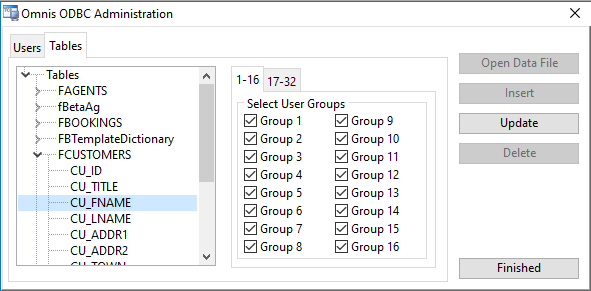
At each stage, and before leaving the Tables tab, press Update to save your changes.
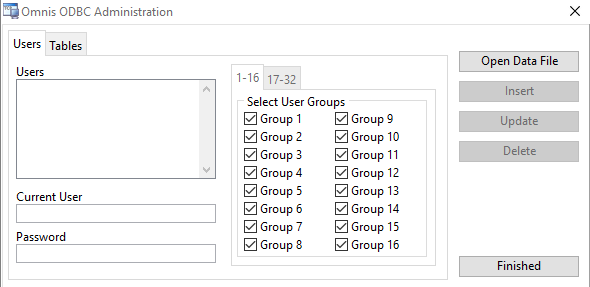
Now that one or more tables have been enabled for ODBC access, click on the Users tab. If one or more users already exist for this data file, they will be shown on the left. Otherwise, enter a new user name in the Current User field to create a new one, add a password then press Insert to save changes.
For existing users, select the user name on the left, modify the fields as required, then press Update to save changes.
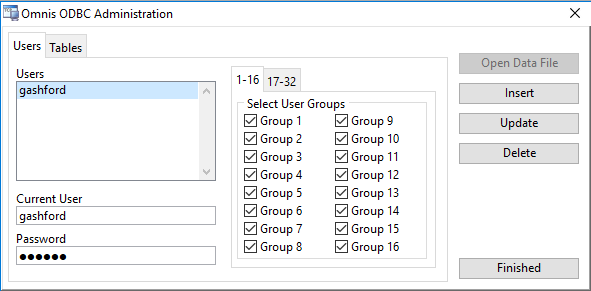
For each user, select one or more group checkboxes. These correspond to the groups assigned to your tables in the previous step. Therefore, a given user will only have access to tables in the selected groups.
If the FCUSTOMERS table in the above example belongs to Group 1 only, the user needs to be a member of Group 1 in order grant access to that table.
If the FBOOKINGS table belongs to its own group, e.g. Group 3, a user must have group 3 selected in order to see it. Similarly, a user that has both groups 1 and 3 selected will be able to access both tables.
The categorization of tables into different access groups and users that have access to those groups is entirely at your discretion. As a minimum, or for basic access to all tables by all users, you can assign all tables to Group 1 (for example), then assign all users to Group1.
Once you have completed your table groups and user group assignments, press Finished to close the ODBC Admin tool. ODBC user information is stored in a (hidden) table named ODBC_USERS. (This table is normally accessible only if you retain access to the data file using Omnis Studio and the OmnisSQL DAM.)
Having added one or more ODBC Users to your Omnis data file, you can now download and setup the Omnis ODBC Driver.
You can download the latest version of the ODBC driver from the Omnis website at: https://www.omnis.net/developers/resources/download/tools/odbcdriver.jsp
Once downloaded, run the installer and follow the steps in order to add the driver to the system.
Once installed, you can add one or more ODBC Data Source Names (DSNs); one DSN is needed for each Omnis data file that you need access to.
On Windows, you can use the 64-bit ODBC Administrator to configure a DSN that uses the 64-bit ODBC Driver (for use with 64-bit apps) or the 32-bit ODBC Driver (for use with 32-bit apps). Both drivers are provided during installation.
Press the Windows key (⊞) then type “ODBC” in order to locate and run the ODBC Administrator.
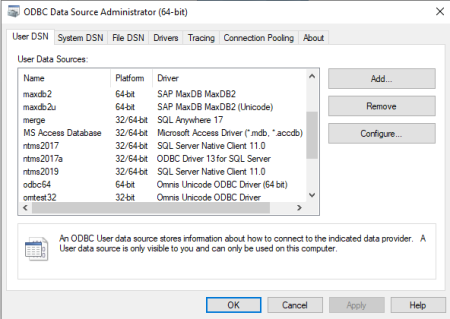
Press Add to create a new User or System ODBC DSN dependent on which tab is currently selected. Select the Omnis ODBC driver that is compatible with your Omnis data file. For data files used with recent versions of Omnis Studio, this will normally be the Omnis Unicode ODBC Driver (64-bit). The choice of 32 or 64-bit depends on the third-party application that you will be using. 32-bit apps may not be able to see ODBC DSNs defined using the 64-bit ODBC Administrator and vice-versa.
Now select the Omnis data file to be accessed or enter the path name directly into the entry field.
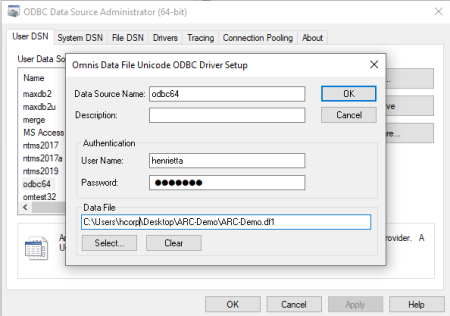
The user name and password you add here must correspond with a name that you added to the data file previously using ODBC Admin tool.
Press OK to complete setup of this ODBC DSN.
You can either use Omnis Studio or your third-party application (such as Microsoft Query/ Excel) to test your ODBC DSN.
From Studio, you can use the SQL Browser by setting-up an ODBC session to the ODBC data source.
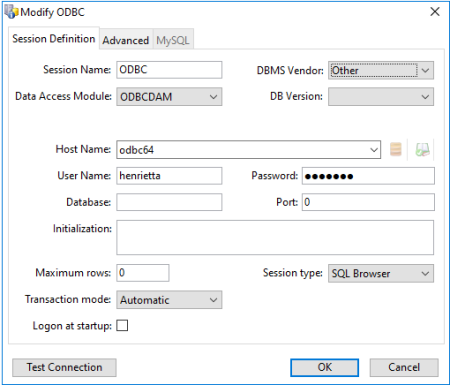
Press Test Connection to verify the connection details.
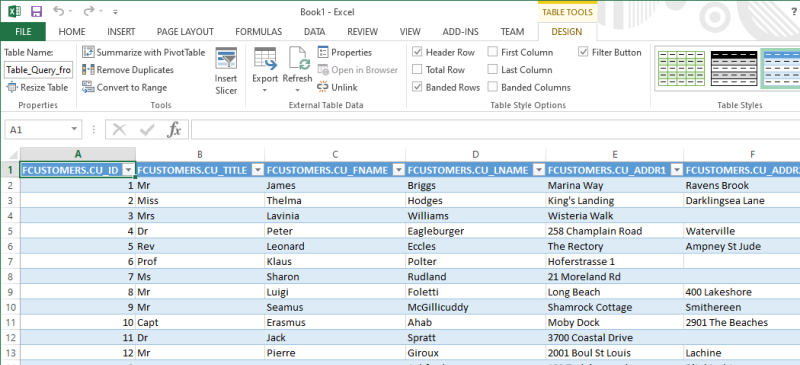
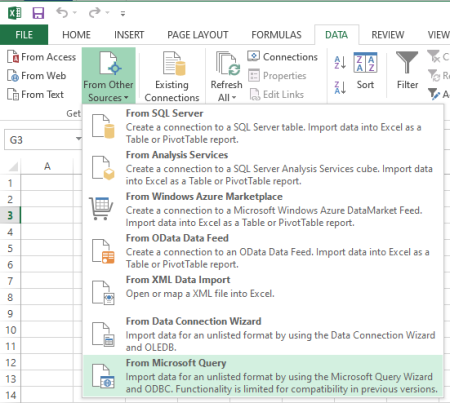
Using Microsoft Excel, go to the Data -> From Other Sources -> From Microsoft Query.
Select the ODBC data source name created in the previous step, then select the table and (optionally) columns that you want to import.
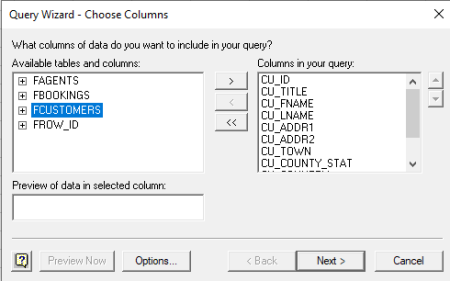
Selecting the table, then pressing > will select all visible columns. Press Next to select additional options and to choose how/where to return the columns. You can return the results to Microsoft Query or import the results directly into your spreadsheet.
Other ODBC-compliant applications provide different ways to import data via ODBC. Please refer to the documentation accompanying the application for specific details.
The only caveat is that the application must be compatible with read-only operation.
The Omnis ODBC driver recnognizes a limited subset of the SQL programming language. Tools like Microsoft Query handle the SQL syntax for you, but if you want to modify the syntax of the SQL SELECT query, please refer to the Omnis Programming Manual where the OmnisSQL language definition is explained in more detail.